参考:
0. 前置
使用咸鱼购买的 yunyi 模型中转服务,同时支持 GPT 和 Codex。
1. 环境准备
环境:Ubuntu 22.04.5。
1.1 查看网络信息
1 | ip addr |
示例输出:
1 | 1: lo: <LOOPBACK,UP,LOWER_UP> mtu 65536 qdisc noqueue state UNKNOWN group default qlen 1000 |
1.2 关闭防火墙
1 | sudo ufw status |
示例输出:
1 | 状态:不活动 |
1.3 安装 nvm
1 | sudo apt update |
示例输出:
1 | 0.39.1 |
1.4 安装 Node.js
1 | nvm install 22 |
示例输出:
1 | v22.22.0 |
1.5 安装 clawbot
1 | curl -fsSL https://clawd.bot/install.sh | bash |
2. 配置
2.1 安装
安装命令:
1 | curl -fsSL https://clawd.bot/install.sh | bash |
安装日志示例:
1 | tom@openclaw:~$ curl -fsSL https://clawd.bot/install.sh | bash |
配置文件路径:~/.openclaw/openclaw.json
1 | { |
2.2 智能记忆系统
参考:
2.3 Searxng 搜索
参考:
2.4 Kook
参考:
2.5 skill
send email- json-render-cli
daily-ai-newsstock-analysis
2.6 飞书
2.6.1 创建飞书机器人
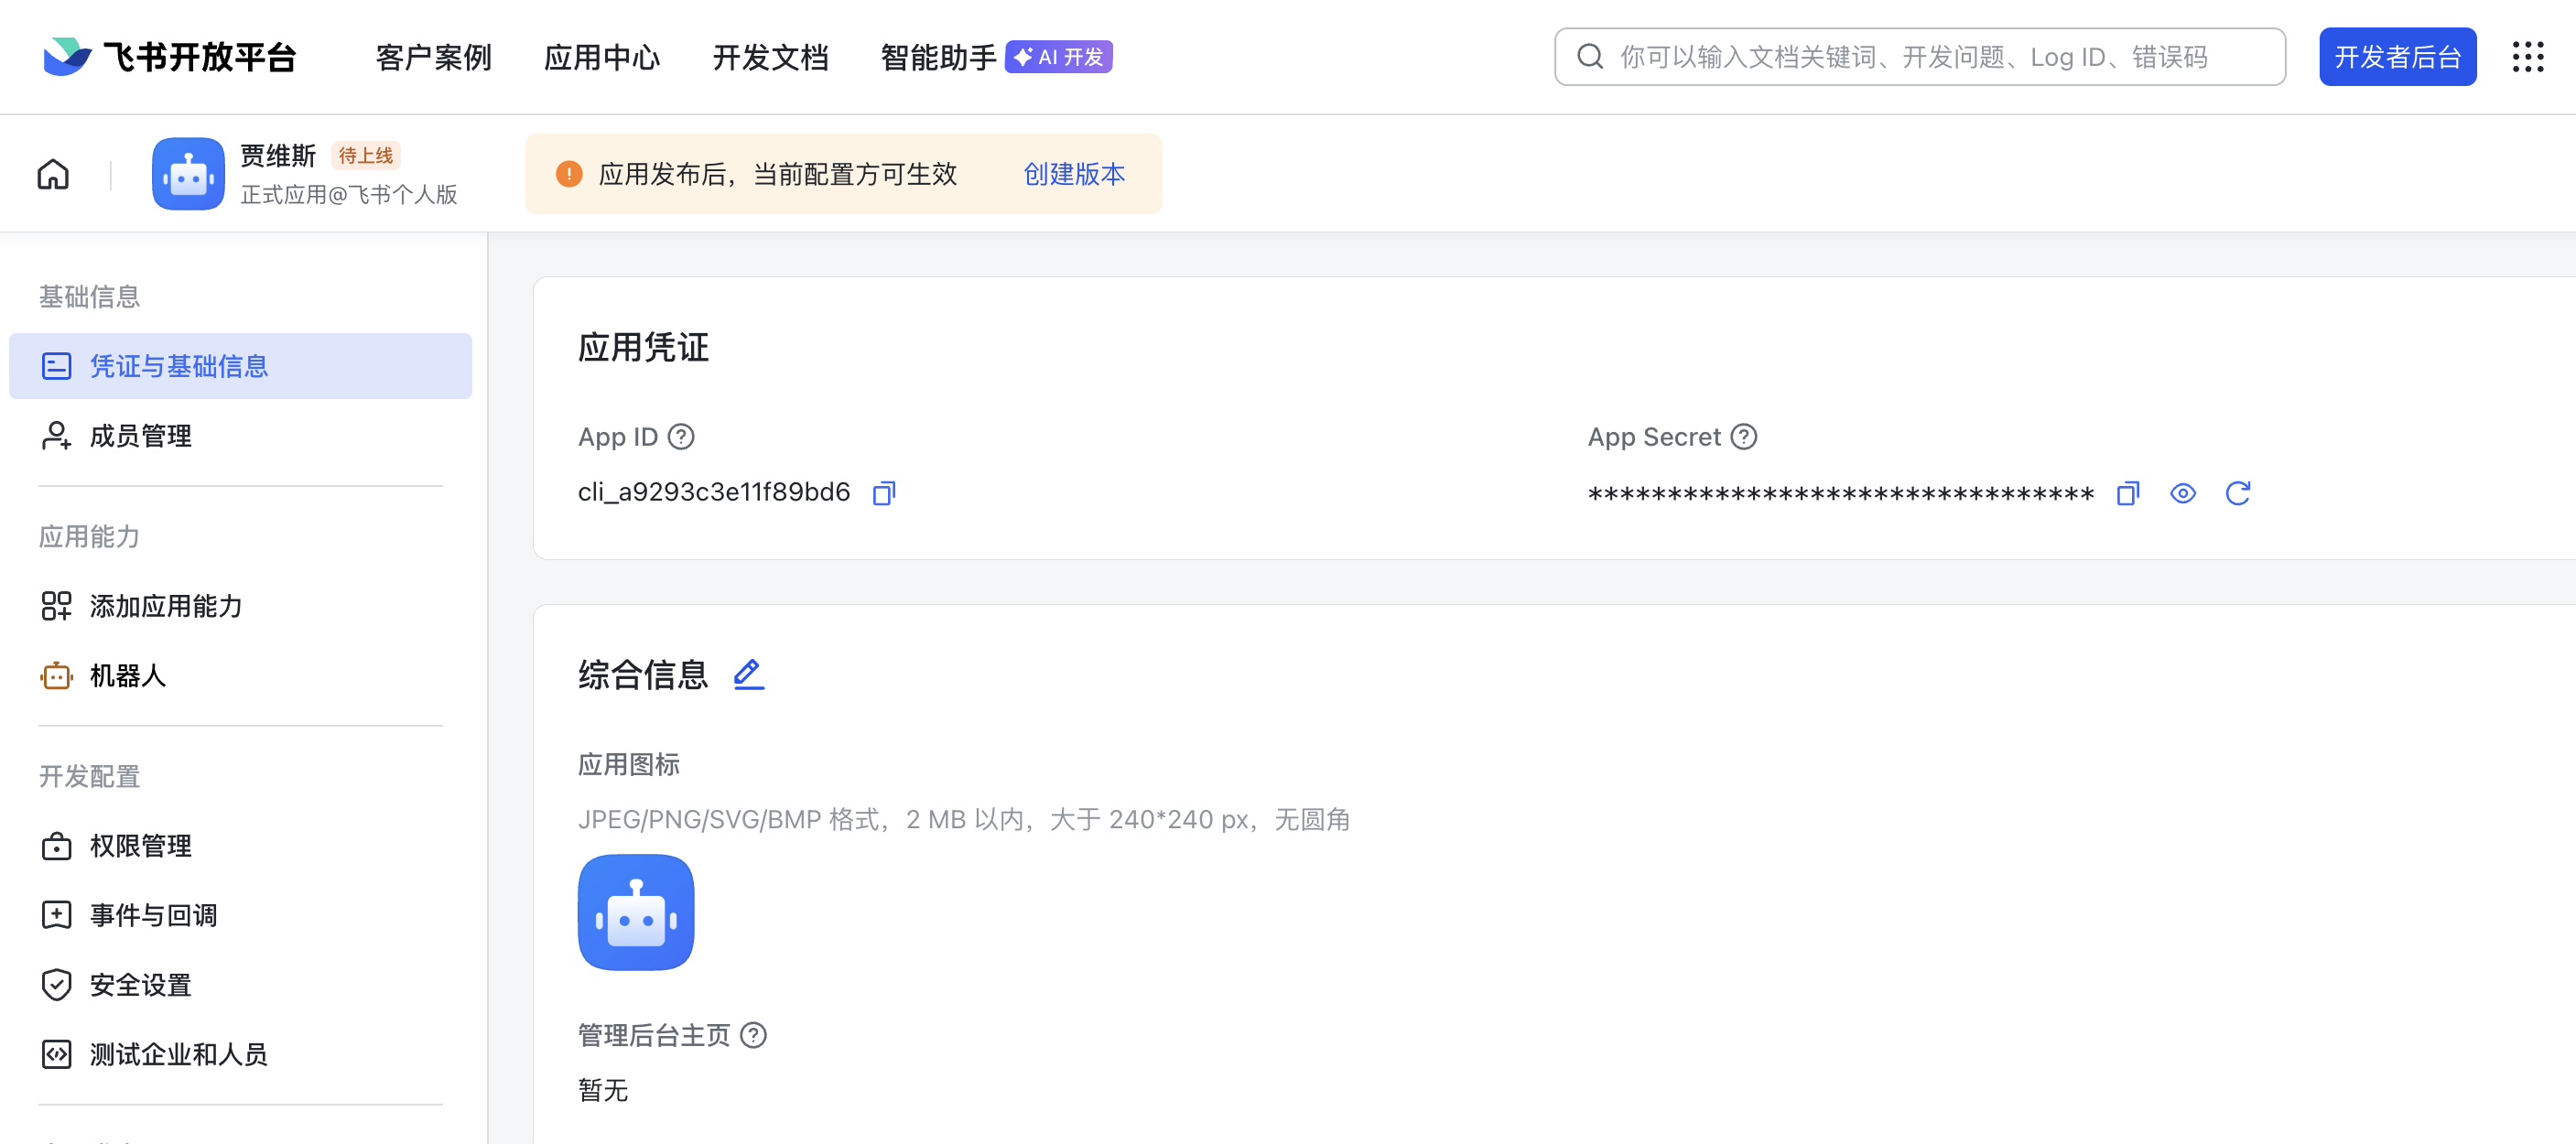
记录下 App Id 和 App Secret。
2.6.2 配置 OpenClaw
1 | openclaw config |
2.6.3 配置 MCP 服务
前置条件:
- 已订阅阿里云 Coding Plan
- 已获取百炼 API Key,格式为
sk-xxx,不是sk-sp-xxx - 已在百炼 MCP 广场开通联网搜索 MCP,每月 2000 次免费
安装步骤:
步骤 1:安装 MCPorter
1 | npm install -g mcporter |
步骤 2:启用 MCPorter 技能
1 | openclaw config set skills.entries.mcporter.enabled true |
步骤 3:添加 MCP 配置
1 | cd ~/.openclaw/workspace |
将
YOUR_API_KEY替换为你的百炼 API Key。
步骤 4:验证安装
1 | mcporter list |
步骤 5:重启 Gateway
1 | openclaw gateway restart |
步骤 6:测试使用
在群里发送:用 mcporter 搜索阿里云的新闻
常见问题排查:
| 问题 | 原因 | 解决 |
|---|---|---|
| 连接失败 | API Key 错误 | 确认使用百炼通用 Key(sk-xxx) |
| 连接失败 | URL 错误 | 检查完整 URL:https://dashscope.aliyuncs.com/api/v1/mcps/WebSearch/mcp |
| 连接失败 | 未开通服务 | 在百炼 MCP 广场确认已开通 |
| 无结果 | 额度用尽 | 每月 2000 次免费,用尽后需等待下月 |
| 模型不调用 | 未明确提及 | 提问时说明“用 websearch MCP 搜索…” |